-

- 2015


-

- 2015
I love top-down knitting. Almost everything I design is worked top down. My favorite thing about top-down garments is that you can try them on as you knit. No two bodies are exactly alike, so I always add notes encouraging knitters to try on as you work to get the fit just how you want it.
Once you understand the basic plan, the process is simple. Over the years I’ve fielded many questions from knitters new to top-down knitting and I’ve never quite found one source that explains the process the way I would. So I took pictures of a recent sample tee as I worked, and below I walk you through my process from the top cast-on to just below the underarms.
Step 1: Cast on the stitches.
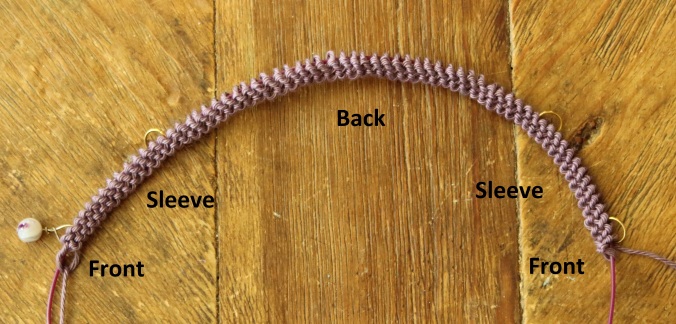
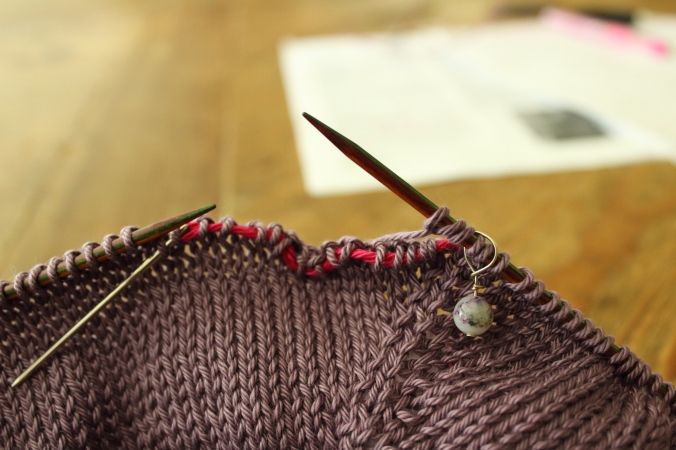
Step 2: Place markers between stitches to set up the different sections of your tee. In my designs, by the end of the set-up row you should have two front sections, two sleeve sections and one back section. Keep in mind that depending on the designer each pattern will be worded slightly differently.
Step 3: Follow pattern directions to work back and forth alternating between purl rows and increase rows. As you work you will slowly form a crescent of knitting with each of the four sections growing as you complete the increases.
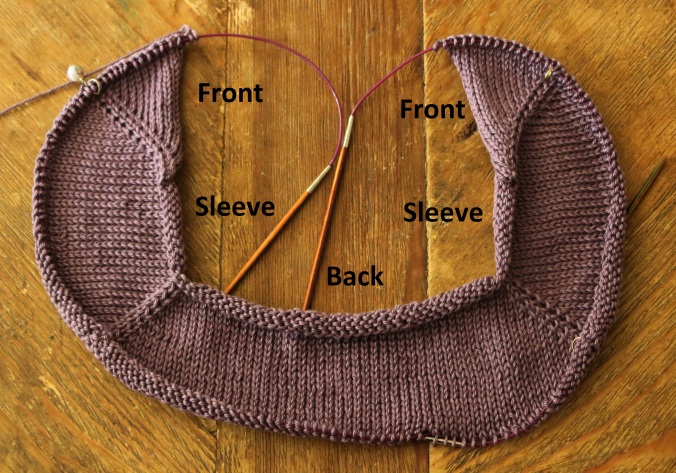
Here is another view of how Step 3 looks on my dress form (named Mona).

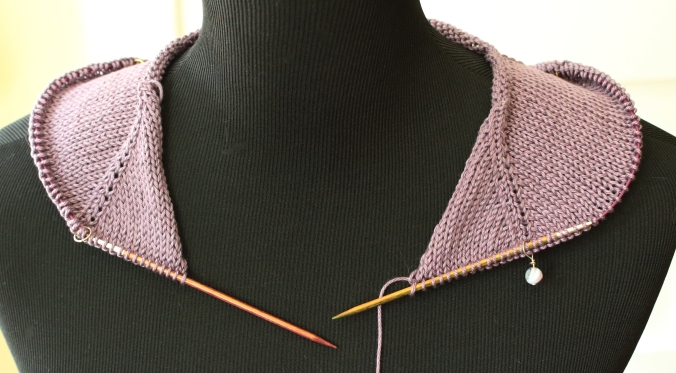
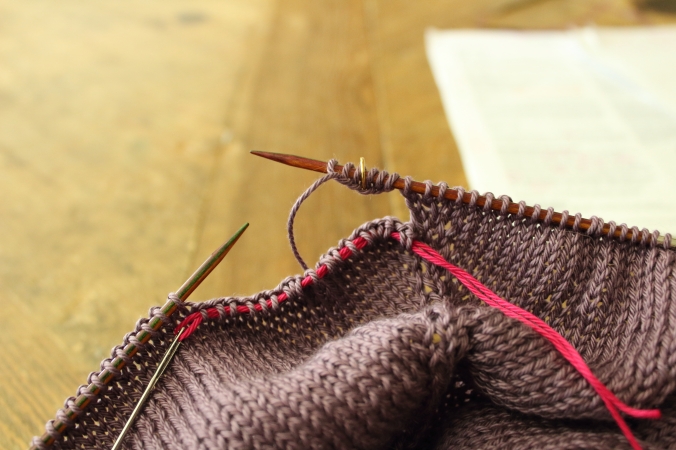
Step 4: Join in the Round. At some point your pattern will instruct you to join this crescent of knitting into a complete circle. In my patterns, generally you work through an increase row, the same way you have been, to the last front stitch. Just after that last stitch you cast-on your front stitches using the backwards loop method and then continue knitting across the front stitches on the other needle towards your unique marker. The tee should now be a full circle on your working needle with the stitches separated into 4 different sections by markers (1st sleeve section, the back, 2nd sleeve section, the front). From here you will be knitting the tee in the round alternating between knit rounds and increase rounds (every round will now be on the RS) until you reach the appropriate number of stitches for your size.

Tip: Knit a few rounds following the pattern directions to alternate knit rounds and increase round. After you have stabilized the front cast-on stitches by working a handful of rounds, this is the perfect place to try on your tee to be sure the neckline is just where you want it. Do keep in mind that the neck ribbing added during finishing will affect your decision!
From here you will continue working down the body until you reach the appropriate number of stitches for your size and the proper length for your underarm stitches. Then you will separate the sleeves from the main body of the tee.
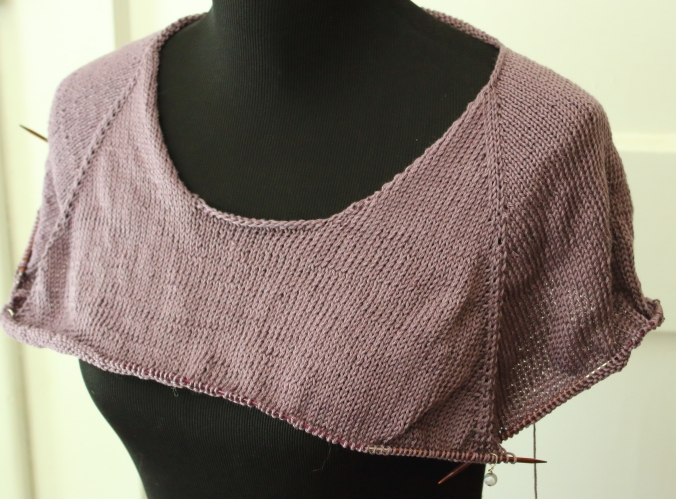
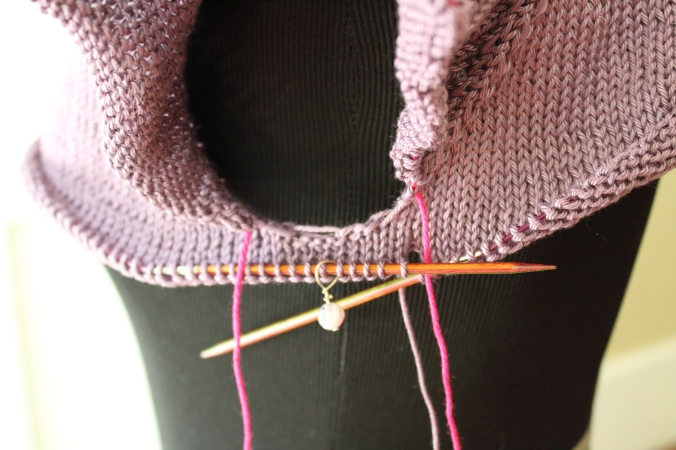
Step 5: Separate Body and Sleeves. On this round you will do two different things. You will cast-on any underarm stitches. And at the same time you will place the sleeve stitches onto scrap yarn for you to come back and work later. In my patterns, you slip the unique marker, cast on underarm stitches, remove first sleeve stitches from the working needle, work across the back stitches, cast-on other side underarm stitches, remove second sleeve stitches from the working needle and finally work across the front stitches.

So at the end of the round you should have two sleeves pulled off the working needle on either side of the garment to work later. And you should have a circle of body stitches left on the working needle (consisting of the back stitches plus the front stitches plus any underarm cast on stitches). The 2 remaining markers are now located directly in the middle under the underarm cast-on stitches where a side seam would be.

Here is another view of how Step 5 looks on Mona.
Tip: After you have stabilized the underarm cast-on stitches by working a handful of rounds, this is another perfect spot to take advantage of how easy it is to adjust a top-down pattern to get just the right fit for your body. Try on the garment and make sure the underarm fit is not too snug or too loose. Feel free to rip back and adjust if you need.
And there you have my basic process from top cast-on to just beneath the underarms. Later I’ll add a post about working down the body and adding waist and hip shaping in my patterns.

Pingback: Tutorial: Waist and Hip Shaping | Tamara's Blog
Thank you very much for this clear explanation! It was a big surprise to find help so quickly!
LikeLike